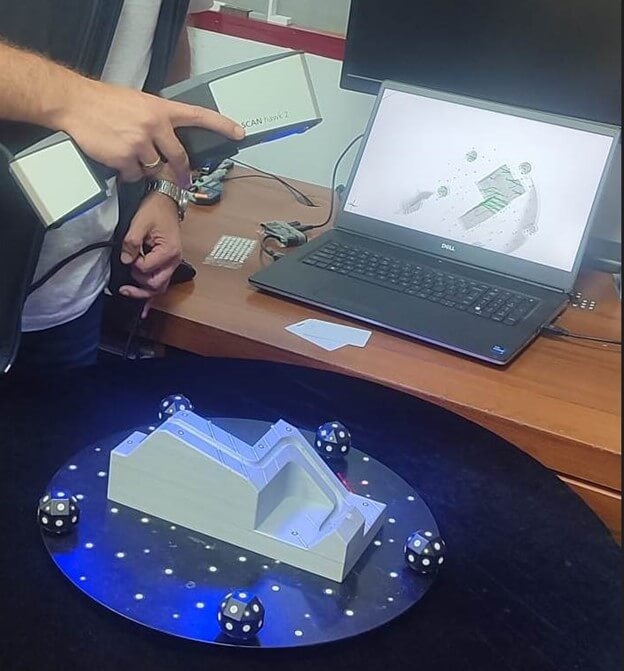
Konveyör, another member of ours who purchased a ZEISS 3D Scanner through our member infoTRON A.Ş., improved its quality control processes by speeding up its quality control processes by 80% in a very short time.
These collaborations between our members make us extremely happy as BEYSAD. We hope that these collaborations will develop further.
For this purpose, we will continue our Professional Business Travels (PBT).
This impressive success story was also published on the official website of the globally renowned company ZEISS. To review the success story: https://www.handsonmetrology.com/blog/3d-scanning-quality-control-in-supply-chain/
Konveyör, which measures the quality control of difficult and thin-shaped pipes, complex fixtures and control apparatus parts with optical scanners, wanted to make their workflow more efficient with an easy-to-use 3D scanner with metrology level precision. By making benchmarks with almost all 3D scanning systems on the market, the company decided that the most accurate 3D scanner for its needs was ZEISS T-SCAN hawk 2, based on the application results and purchased the hawk 2 laser 3D scanner.
We would like to convey this synergistic success story between BEYSAD members from Konveyör Quality Control and Assurance Manager, Ms. Ela Küçükçiftçi, in terms of setting an example and sharing experience.
“With our old 3D scanning system, we had to carry out the quality control of our products with the help of mattifying spray. These requirements could cause us to lose sensitivity and damage our products. For this reason, we needed a precise solution that would eliminate dimensional uncertainty and the need for extra intervention in our products.
We conveyed these needs to the infoTRON Quality Control and Reverse Engineering team. The team recommended the ZEISS T-Scan hawk 2 scanner, which is easy to use and has high scanning sensitivity, to meet these needs exactly.
After purchasing the ZEISS T-SCAN hawk 2, we received a 4-day training by the infoTRON Quality Control and Reverse Engineering team. During this training, we practiced on our own products and exchanged many ideas to improve our quality control processes. Collaboration with the infoTRON Reverse Engineering Application Engineer team from the first day of the training until today.
We are very happy to be in it, we feel the team is with us whenever we need it.
We can scan the surfaces of our parts without having to spray them and without any difficulty with Hawk 2, which has blue laser technology. We can use the scanner anywhere because it is portable and lightweight. Thanks to ZEISS T-SCAN hawk 2, we accelerated our quality control processes by 80%.
By reporting the accuracy of the productions we make for the companies we supply with repeatable dimensional precision, with the certified ZEISS INSPECT Optical 3D software, we ensure that our productions are delivered without errors, and in case of any problems, we catch this problem early and prevent repetitive workflow processes.”


